Juancho's BBQ Chicken & Potato Combo
Join Juancho on his backyard BBQ adventures and discover a safe, sure and easy way to barbecue with optimum results - It's relaxing, it's fun, and it's absolutely delicious!!!This Saturday afternoon the weather turned out beautiful and although we had originally planned something else, I simply couldn't resist firing up the Weber. It was really a last minute decision so it had to be something simple and easy. We decided to go for the old smoke-grilled chicken and potatoes.
Step 1 - Buy Chicken and Potatoes
Fifteen minutes before the shops closed we bought two chickens of about 2½ pounds (1200gr) each. We also picked up 2 pounds (900gr) of small potatoes, peeled and ready.
Step 2 - Make Dry Rub
For the dry rub we prefer what we call Juanita's BBQ Rub USA #1 . We have been using this rub on grilled chicken once or twice a month for about two years now and it is an absolute winner.
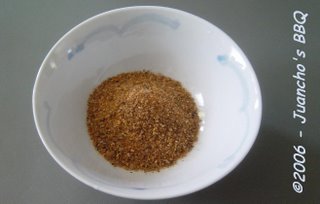
My wife Juanita developed this rub using a recipe from one of Steven Raichlen's wonderful barbecue cookbooks as a starting point. We ran out of rub so I made a new batch as follows:
- 4 Tablespoons Brown Sugar (firmly packed)
- 4 Tablespoons Sweet Paprika Powder
- 4 Tablespoons Coarse Seasalt (no iodine)
- 3 Tablespoons Coarsly Ground Black Pepper
- 1 Teaspoon Cayenne Pepper
- 2 Teaspoons Garlic Powder
- 2 Teaspoons Onion Powder
I put all ingredients in a non-reactive bowl and mixed thoroughly, using the back of a spoon to break the lumps of brown sugar. We use about 1½ to 2 tablespoons of rub for every two pounds (±1 kilo) of meat.
The above will yield about 1 cup of dry rub. I put the remaining rub in an airtight jar. Stored in a cool and dark place it will keep for months.
Step 3 - Light My Fire...
I lit a full chimney of charcoal briquettes. While the coals were getting hot and ready, I prepared the chickens and the potatoes.
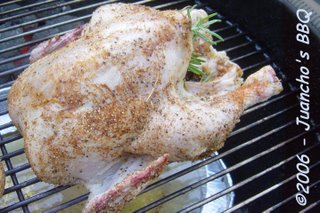
Step 4 - Prep the Chicken
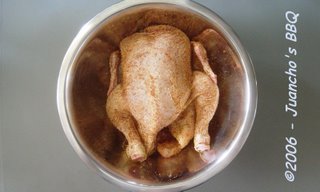
I used scissors to cut off some excess skin and grease. I then washed the chickens under cold running water and blotted them dry with paper towels. Then used my hands to rub in 2 tablespoons of dry rub on each chicken.
Caution: When working with raw meat, make sure all work surfaces, utensils and your hands are thoroughly clean before you start, and are cleaned thoroughly immediately after you finish.
Step 5 - Prep the Weber
After the chickens were rubbed and ready, I set up our Weber kettle grill for indirect grilling.
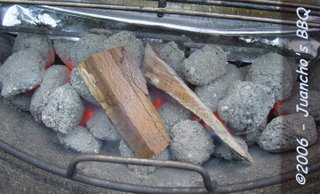
Once the coals were glowing nice and grey I added a few pieces of soaked wood. This time I used European Beech, a hard type of wood that burns quite hot but slowly. (This type of wood, along with oak, is also used to smoke eel)
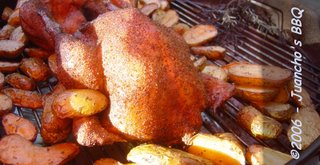
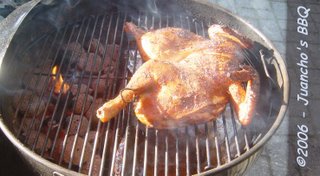
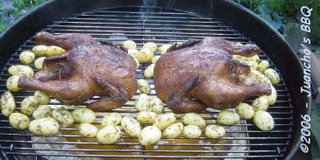
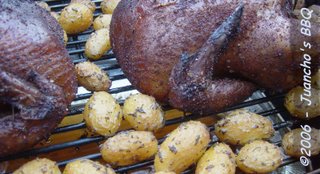
Step 6 - Chicken on the Grill
I stuck a twig of fresh Rosemary inside the breast cavity of each chicken and put them on the grill:
Step 7 - Prep the Potatoes
I stirred one tablespoon of olive oil into the peeled potatoes, then mixed in:
- 1 tablespoon fresh Rosemary, finely chopped
- 1 tablespoon fresh Tarragon, finely chopped
- ½ tablespoon of Juanita's BBQ Rub USA #1 (see above)

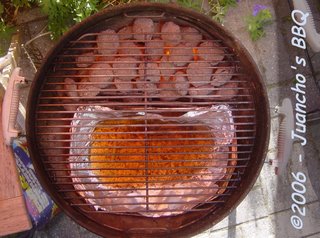
Step 8 - Potatoes on the Grill
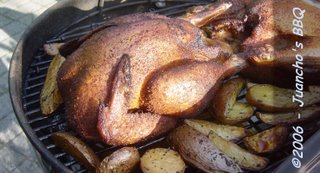
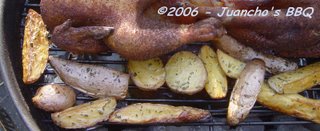
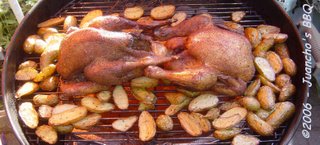
I gave the chickens a headstart of half an hour, then added the potatoes:
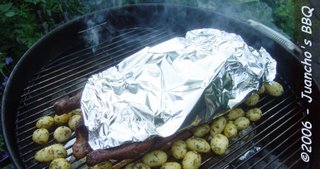
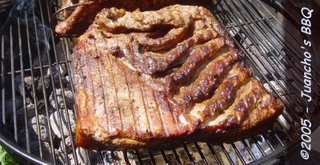
I thought the chickens were brown enough like this, so I covered them loosely with aluminium foil. This may not look too professional, but it is effective and it is the end result that counts.
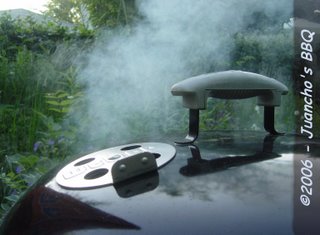
Step 9 - Relax
I just love that whisp of blue smoke, can watch it for hours...
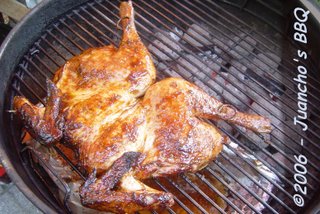
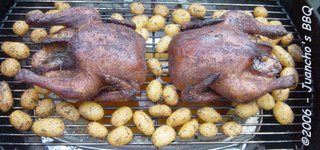
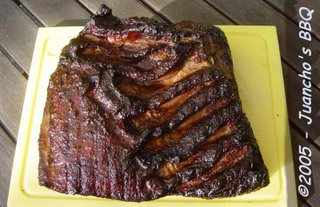
Step 10 - Dinner Time
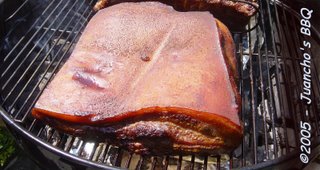
After an hour and a half of smoking, the chickens were well done. (to check, I cut one open between thigh and breast) In the meantime, the potatoes had been smoking for one hour and were ready as well:
Close-up:
The taste? I could give you my personal opinion in terms of great, excellent, exquisite smokey flavour, best chicken in the world, etc.. But really, what would that mean to you? I therefore recommend that you check out this easy recipe in your own backyard. Believe me, you won't be disappointed.
More to come...
Thanks for reading, leave a comment!
posted by Juancho at 2:53 AM
2 comments
![]()
![]()

 To make sure these 'taters are done, pick one of the thickest wedges and check the inside.