Friday, August 04, 2006

Why I use Charcoal Briquettes


Join Juancho on his backyard BBQ adventures and discover a safe, sure and easy way to barbecue with optimum results - It's relaxing, it's fun, and it's absolutely delicious!!!
Sometimes you read barbecue books or articles which claim that - a.o. for reasons of purity - the regular original charcoal is to be preferred above charcoal briquettes.

I don't know why. I've used a briquet or two and I've never smelled or tasted anything wrong.

I always use charcoal briquettes because of their even shape and size and more constant quality.

After a few chicken-mummies I found that with briquettes it is easier to control and maintain the fire and temperature inside the barbecue during hot smoking.

Once coal and fire become a (more or less) constant factor, it is easier to repeat previous good experiences, or to properly adjust the recipe or smoking time to improve on previous experiences.

What do you think?

Keep smokin',

Juancho


More to come...


Thanks for reading, leave a comment!


Sunday, June 18, 2006

Juancho's BBQ Chicken & Potato Combo


Join Juancho on his backyard BBQ adventures and discover a safe, sure and easy way to barbecue with optimum results - It's relaxing, it's fun, and it's absolutely delicious!!!
This Saturday afternoon the weather turned out beautiful and although we had originally planned something else, I simply couldn't resist firing up the Weber. It was really a last minute decision so it had to be something simple and easy. We decided to go for the old smoke-grilled chicken and potatoes.

Step 1 - Buy Chicken and Potatoes

Fifteen minutes before the shops closed we bought two chickens of about 2½ pounds (1200gr) each. We also picked up 2 pounds (900gr) of small potatoes, peeled and ready.

Step 2 - Make Dry Rub
For the dry rub we prefer what we call Juanita's BBQ Rub USA #1 . We have been using this rub on grilled chicken once or twice a month for about two years now and it is an absolute winner.


My wife Juanita developed this rub using a recipe from one of Steven Raichlen's wonderful barbecue cookbooks as a starting point. We ran out of rub so I made a new batch as follows:

  • 4 Tablespoons Brown Sugar (firmly packed)
  • 4 Tablespoons Sweet Paprika Powder
  • 4 Tablespoons Coarse Seasalt (no iodine)
  • 3 Tablespoons Coarsly Ground Black Pepper
  • 1 Teaspoon Cayenne Pepper
  • 2 Teaspoons Garlic Powder
  • 2 Teaspoons Onion Powder

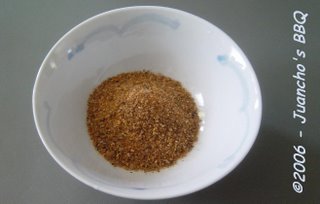
I put all ingredients in a non-reactive bowl and mixed thoroughly, using the back of a spoon to break the lumps of brown sugar. We use about 1½ to 2 tablespoons of rub for every two pounds (±1 kilo) of meat.

The above will yield about 1 cup of dry rub. I put the remaining rub in an airtight jar. Stored in a cool and dark place it will keep for months.

Step 3 - Light My Fire...
I lit a full chimney of charcoal briquettes. While the coals were getting hot and ready, I prepared the chickens and the potatoes.

Step 4 - Prep the Chicken
I used scissors to cut off some excess skin and grease. I then washed the chickens under cold running water and blotted them dry with paper towels. Then used my hands to rub in 2 tablespoons of dry rub on each chicken.

Caution: When working with raw meat, make sure all work surfaces, utensils and your hands are thoroughly clean before you start, and are cleaned thoroughly immediately after you finish.


Step 5 - Prep the Weber
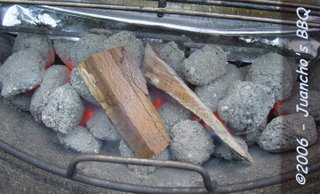
After the chickens were rubbed and ready, I set up our Weber kettle grill for indirect grilling.

Once the coals were glowing nice and grey I added a few pieces of soaked wood. This time I used European Beech, a hard type of wood that burns quite hot but slowly. (This type of wood, along with oak, is also used to smoke eel)


Step 6 - Chicken on the Grill
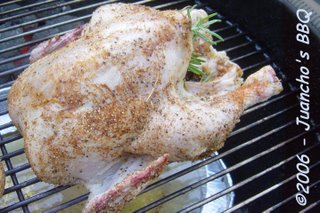
I stuck a twig of fresh Rosemary inside the breast cavity of each chicken and put them on the grill:


Step 7 - Prep the Potatoes
I stirred one tablespoon of olive oil into the peeled potatoes, then mixed in:

  • 1 tablespoon fresh Rosemary, finely chopped
  • 1 tablespoon fresh Tarragon, finely chopped
  • ½ tablespoon of Juanita's BBQ Rub USA #1 (see above)

Step 8 - Potatoes on the Grill
I gave the chickens a headstart of half an hour, then added the potatoes:

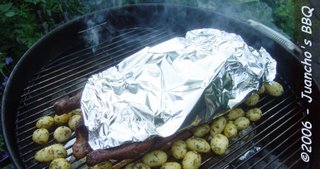
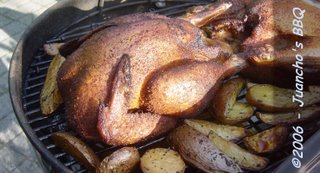
I thought the chickens were brown enough like this, so I covered them loosely with aluminium foil. This may not look too professional, but it is effective and it is the end result that counts.

Step 9 - Relax
I just love that whisp of blue smoke, can watch it for hours...

Step 10 - Dinner Time
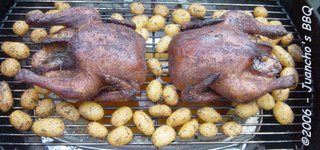
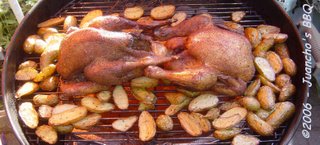
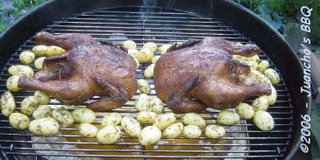
After an hour and a half of smoking, the chickens were well done. (to check, I cut one open between thigh and breast) In the meantime, the potatoes had been smoking for one hour and were ready as well:

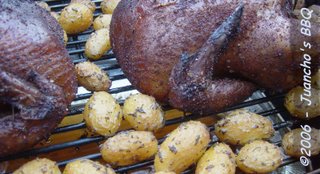
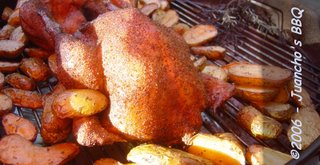
Close-up:

The taste? I could give you my personal opinion in terms of great, excellent, exquisite smokey flavour, best chicken in the world, etc.. But really, what would that mean to you? I therefore recommend that you check out this easy recipe in your own backyard. Believe me, you won't be disappointed.


More to come...


Thanks for reading, leave a comment!


Wednesday, June 14, 2006

Juancho's Paramaribo Pork Roast

Join Juancho on his backyard BBQ adventures and discover a safe, sure and easy way to barbecue with optimum results - It's relaxing, it's fun, and it's absolutely delicious!!!
In Surinam this pork roast is called Losie Agoe Mètie. My good friend Edgar traditionally makes it on Christmas Eve. The recipe probably finds its origin in the Chinese community in Paramaribo. Ed usually takes a fair piece of porkside, but you could use any cut of pork meat, or even the whole hog.
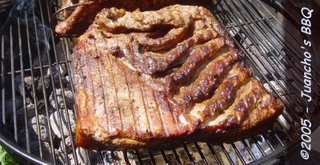

This is how I make a Paramaribo Pork Roast on my Weber kettle grill. The overall principles should remain the same if you use a different make of grill, as long as it is a closed grill and you set it up for indirect grilling.

The meat:

  • 5 to 7 pounds of fresh porkside or boston butt

For the marinade:

  • 1½ cup sweet soy sauce
  • 2 teaspoons ginger powder
  • 6 teaspoons Chinese five-spices powder
  • 8 cloves of fresh garlic, flattened and finely chopped (or 2 tablespoons of garlicpowder)

Preparations:
Wash the pork and blot dry using paper towels. If you are going to do a porkside with skin on, pierce a whole bunch of holes in the porkskin using a sharp fork. At this point you could consider rubbing some salt in the punctured skin and let dry for a couple of hours in a cool place. This will yield a more crispy skin after roasting.

Mix all ingredients for the marinade and marinate the pork, at least one hour, preferably overnight. For marinating, a zip-lock bag works best.

A word of caution here: when working with raw meat, make sure all work surfaces, utensils and your hands are thoroughly clean before you start, and clean thoroughly immediately after you finish.

Set up your barbecue for indirect grilling. I use a Weber chimney to light about 24-30 pieces charcoal briquettes. Once the briquettes are spread on both sides of the Weber barbeque and glowing well, I add a few lumps of wet apple wood.

In the center of the Weber barbeque I place a dripping pan with about 2 pints of water. For special flavour effects you could replace the water by beer or wine, but I don't believe that a true Surinam man would do something crazy like that.
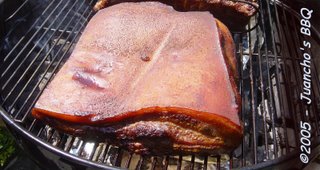

Get Smokin' !
Get the meat out of the marinade and blot dry using paper towels. Don't throw away the remaining marinade.

Put the meat on the grill with the skin or fat upwards.

Close the lid of the Weber and check if the vent holes in the lid and the bottom of the Weber are fully open. Wait a couple of minutes until you see a whisp of blue smoke escaping from the top vent holes. The idea is to slow roast the meat, so the trick is to keep the fire low without killing it. Close the bottom vent holes, then open halfway.

Every ten minutes or so, check if the fire is still going "not too low and not too high". To prevent too much heat loss, try to do this without opening the lid, but when in doubt don't hesitate. Better safe than sorry.

Meanwhile, boil the remaining marinade in a small saucepan. Stir in one tablespoon of honey and use as a basting sauce.

After about one hour of smoking, baste and turn the meat. Use a couple of sturdy thongs, and try not to squeeze the meat too much in order to prevent loss of juices. For the same reason you don't want to use a fork eather.

After about two hours of smoking, baste and turn the meat again. At the same time you add about eight to ten glowing charcoal briquettes to the fire on each side of the Weber grill, and you add some more smoking wood as you please. Be careful not to overdo the smoking, though. Too much smoke will leave a bitter taste on the wood.

If at this point in time you consider the meat brown enough, you may want to cover it loosely with aluminium foil before closing the lid of your Weber.

After about three hours of smoking, baste turn the meat again. Keep the meat loosely wrapped with aluminium foil to prevent it from blackening too much.


Dinner Time!
After 3 to 4 hours slow roasting the meat should be truly well done. You can check this with a meat thermometer, about 180 degrees F (just over 80 degrees C) is OK. (Even so, like it or not, I always check the doneness of the meat by cutting it open in the middle to check the interior)
Once you are sure the pork meat is well done, baste it one final time and transfer it from the grill to a cutting board or (pre-heated) plate. Leave it covered in aluminium foil for 10 to 15 minutes in order to allow the juices and temperature inside the meat to re-distribute and so obtain a more tender and juicy effect.
Cut the meat in thin slices for serving.

Favourite Combinations:
In Surinam, roasted pork is typically served with white rice, vegetables like "kouseband" and fried platano ("baka bana").

Favourite Drinks:
Cold mineral water with fresh lemon slices, cold beer, cold dry white wine. When served by itself as a snack this pork goes very well with a heavy red wine.


Think about tomorrow, buy an extra large piece of meat and make sure you have left-overs…


Keep smokin' - More to come...


Thanks for reading, leave a comment.
Saturday, June 10, 2006

Juancho's Smoke-Grilled Potatoes

Join Juancho on his backyard BBQ adventures and discover a safe, sure and easy way to barbecue with optimum results - It's relaxing, it's fun, and it's absolutely delicious!!!
Potatoes… So underestimated, yet so beautiful !
Once you have tried these smoke-grilled potatoes, you won't be able to resist making them every time you see some spare space on you barbecue grate. This great sidedish can be prepared very easily alongside smoked meat such as chicken or spareribs.

The Potatoes
Wash 2 pounds (± 1 kilo) of potatoes throroughly under cold running water, brushing the skin all around with a stiff brush to clean off any soil or dirt. Blot dry using a clean towel. Since these potatoes are going to be cooked with the skin on, you may want to use biologically grown potatoes.
Cut smaller potatoes in half, larger potatoes in wedges. The trick is to obtain a bunch of potato parts with approximately equal thickness.
Put the potato parts in a salad bowl, add 1 or 2 tablespoons of vegetable oil, and stir thoroughly with a spoon to spread the oil evenly over all surfaces.


Seasoning
To add some extra taste, add ½ teaspoon of salt and 2 to 4 tablespoons of finely chopped herbs to the potatoes. We get very tasty results from a random mix of the following herbs which we grow fresh in our BBQ garden:

  • Rosemary
  • Thyme
  • Tarragon
  • Spearmint
  • Chives
  • Sage


The Barbecue
Put the potato wedges around the meat on any grate area not directly above the fire. After about an hour of smoking without opening the lid too often, these potatoes should be well done. If you leave them a bit longer, they will get that nice crispy skin! It's worth experimenting.

Time to Relax?
Don´t worry, since these grilled potatoes will need at least 1 hour until they´re done (depending on the heat) they won´t interfere with your well deserved rest while your meat is smoking.

Dinner Time
After all that hard relaxing and/or riminiscing with your buddies, it's dinner time!

To make sure these 'taters are done, pick one of the thickest wedges and check the inside.


Favourite Combinations:
You may want to serve these smoked potato wedges with ketchup, mayonaise, barbecue sauce or any other sauce of your liking.
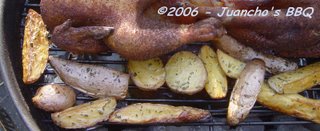
These smoked potatoes go well with any kind of meat, for example grilled chicken (see pictures). They also combine very well with the fresh taste of coleslaw or other salad.

Favourite Drinks:
Cold mineral water with fresh lemon slices, cold beer, cold dry white wine. When served by itself as a snack they go very well with a heavy red wine.

More to come...


Thanks for reading, leave a comment.
Thursday, June 08, 2006

Juancho's Smoke-Grilled Chicken

Join Juancho on his backyard BBQ adventures and discover a safe, sure and easy way to barbecue with optimum results - It's relaxing, it's fun, and it's absolutely delicious!!!
Chicken… There must be at least a thousand ways to prepare a chicken...
The way described here below is our favourite. It's easy, it's juicy, it's spicy, it's crispy, it's smokey. And it's very, very tasty! Prepared in this way, even the cheapest chicken will taste excellent.


We normally use our small Weber kettle grill, set up for indirect grilling, which will accommodate two chickens in the range of 2 to 4lbs (1-2 kilos).
Here's how it works:

The Chicken:
Go buy one or two of your favourite chickens.
Wash under cold running water, removing any loose parts, dangling fat, excess skin, etc., and blot dry inside and outside using paper towels.
Put it on a clean and dry surface, or in large non-reactive bowl, and apply a dry rub, inside and outside, spreading the rub with your hands and working it into all crevices until you have a nicely and evenly covered bird.

A word of caution here: when working with raw meat, make sure all work surfaces, utensils and your hands are thoroughly clean before you start, and clean thoroughly immediately after you
finish.

The Dry Rub:
For the dry rub we prefer what we call Juanita's BBQ Rub USA #1 . We have been using this rub on grilled chicken once or twice a month for two years now and it is an absolute winner. My wife Juanita developed this rub using a recipe from one of Steven Raichlen's wonderful barbecue cookbooks as a starting point.

  • 4 Tablespoons Brown Sugar (firmly packed)
  • 4 Tablespoons Sweet Paprika Powder
  • 4 Tablespoons Seasalt (no iodine)
  • 3 Tablespoons Coarsly Ground Black Pepper
  • 1 Teaspoon Cayenne Pepper
  • 2 Teaspoons Garlic Powder
  • 2 Teaspoons Onion Powder

Put all ingredients in a non-reactive bowl and mix thoroughly. Break any lumps of brown sugar using the back of a spoon.
Use about 1½ to 2 tablespoons of rub for every two pounds (±1 kilo) of meat. The above will yield about 1 cup of dry rub. Put the remaining rub, if any, in an airtight jar or zip-lock bag. Stored in a cool and dark place it will keep for months.

The Barbecue:
Set up your barbecue for indirect grilling. To roast 1 or 2 chickens we normally use a full Weber chimney of charcoal briquettes, a bit more in winter. Pour about 2 pints (±1 liter) of water into the dripping pan, wine or beer are optional.
Once the charcoal is going well and showing a grey crust, put a few chuncks of wood on top of the hot coals. To increase the smoking effect you should soak this wood in water for at least a couple of hours, prefereably days. Apple, cherry or oak wood will do well, stay away from woods from coniferous trees such as pine or cedar.
With your barbecue all set and smoking, stick the chicken on the grill above the dripping pan. Close the lid, open the vent valves on top and bottom.

Time to Relax:
With that chicken sitting in your black backyard coal-fired microwave, take it easy. Get yourself a drink, sit down, watch that whisp of smoke curl up and follow a path to the neighbours. Aaah, enjoy that lovely smell. There's nothing that can make you feel more down to earth and relaxed.
Try to resist peeking under the lid. Every time you open your barbecue you will loose heat, and the cooking process will take longer. On the other hand, if you have time anyway, what the heck…
After about forty five minutes or one hour of smoking, you should check under the lid to see if the chicken skin is not turning too dark. Once you like the color of the skin, cover the chicken loosely with aluminium foil and return the lid.


Dinner Time:
After about an hour and a half of smoking without opening the lid too often, the chicken should be well done. To check whether the chicken is really done, I simply cut off a leg to see if the inside meat has the proper texture and prefereably comes off the bone easily. You could also check this by inserting an instant read thermometer in the thickest parts which should read about 180 degrees F (just over 80 degrees C).

Favourite Combinations:
This hot smoked chicken combines very well with smoked potatoes (see pictures) and coleslaw.

Favourite Drinks:
Cold mineral water with fresh lemon slices, cold beer, cold dry white wine.


More to come...


Thanks for reading, leave a comment.

Juancho's Highway Chicken

Join Juancho on his backyard BBQ adventures and discover a safe, sure and easy way to barbecue with optimum results - It's relaxing, it's fun, and it's absolutely delicious!!!
Chicken… There must be at least a thousand ways to prepare a chicken...
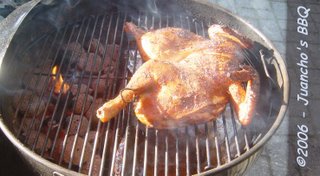
Yes, but sometimes your options are limited by circumstances... Just imagine you scrape your chicken from the highway after it's been hit by a couple of 18-wheelers... Nothing lost! After an hour in your BBQ it will look like this:


The Chicken...
Of course you're not going to wait until you actually find a flattened chicken on the tarmac. It's much quicker and easier to go to your local supermarket, buy your regular favourite bird, cut out the spine, wash it under cold running tap water, blot dry using paper towels, fold it open and flat, stick in two steel skewers crosswise to keep it flat, season it and stick it on your grill.

Hey, you can still tell your guests you found it on the highway. It's a great conversation piece!

A word of caution here: when working with raw meat, make sure all work surfaces, utensils and your hands are thoroughly clean before you start, and clean thoroughly immediately after you finish.

The Dry Rub:
Don't hesitate to use your own favourite dry rub. For the grilled chicken on the pictures we used Juancho's BBQ Mustard Rub. It goes like this:

  • 8 Tablespoons Brown Sugar (firmly packed)
  • 3 Tablespoons Seasalt (no iodine)
  • 4 Tablespoons Garlic Powder
  • 4 Tablespoons Coarsly Ground Black Pepper
  • 4 Tablespoons Ground Mustard Seed

Put all ingredients in a non-reactive bowl and mix thoroughly. Break any lumps of brown sugar using the back of a spoon.
Use about 2 to 3 tablespoons of rub for every 2 pounds (±1 kilo) of pork ribs or chicken, more on thicker cuts like a Boston butt or pork shoulder.
The above will yield about 1½ cup of dry rub. Put the remaining rub, if any, in an airtight jar or zip-lock bag. Stored in a cool and dark place it will keep for months.

The Barbecue:
To obtain sufficient grate area to accommodate a chicken spread out flat, we set up our little Weber for indirect grilling like this:

With the above grate arrangement you can first roast the chicken directly over the coals for a couple of minutes, then move it above the dripping pan for indirect grilling, skin side downwards, legs towards the fire.

For smoked chicken, add a few chuncks of wood on top of the hot coals. To increase the smoking effect you should soak this wood in water for at least a couple of hours, prefereably days. Apple, cherry or oak wood will do well, stay away from woods from coniferous trees such as pine or cedar.

Time to Relax:
With everything set, close the lid, open the vent valves on top and bottom, have a seat, relax, finish your drink. Watch that whisp of smoke curl up and spread its fragrant smell through the neighbourhood.

After about half an hour of smoking, open the lid and flip the Highway Chicken around, skin side upwards, legs towards the fire. If you feel the fire is burning too hot you may consider closing the bottom vent halfway. (Always keep the top vents fully open) If necessary, add some more smoking wood.

At this point in time, the chicken that we found on the highway looked like this:

Glazing:
As an option, you could consider glazing your Highway Chicken with a sugar- or honey-based basting sauce. Since we used Juancho's BBQ Mustard Rub, we also used Juancho's BBQ Mustard Glazing:

  • 2 Tablespoons Honey;

  • 1 Tablespoon Olive Oil;

  • 1 Tablespoon Mustard;

Shake and/or stir the ingredients and brush on all sides of the chicken after about one hour of smoking. At the same time you could check the meat for doneness. If you feel that the chicken skin is turning too dark, cover the chicken loosely with aluminium foil and close the lid.

Dinner Time:
After about an hour and fifteen minutes of smoking without opening the lid too often, the chicken should be well done. To check whether the chicken is really done, I simply cut off a leg to see if the inside meat has the proper texture and prefereably comes off the bone easily. You could also check this by inserting an instant read thermometer in the thickest parts which should read about 180 degrees F (just over 80 degrees C).

Favourite Combinations:
This hot smoked Highway Chicken combines very well with smoked potatoes and coleslaw.

Favourite Drinks:
Cold mineral water with fresh lemon slices, cold cold beer, cold dry white wine.

More to come...


Thanks for reading, leave a comment.

Thursday, June 01, 2006

Juancho's Favourite Cookbooks

A good cookbook will tell you how to properly prepare food - An excellent cookbook will inspire and motivate you to try something new, to explore places where you've never been.

Here's five of Juancho's favourite excellent cookbooks:

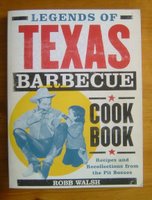
Legends of Texas Barbecue CookbookLegends of Texas Barbecue Cookbook
by Robb Walsh
ISBN 0-8118-2961-8


BBQ USABBQ USA
by Steven Raichlen
ISBN 0-7611-2015-7 or ISBN 0-7611-3133-7


The Chinese Village CookbookChinese Village Cookbook
by Rhoda Yee
ISBN 0-912738-07-3


El Libro de la Cocina MexicanaEl Libro de la Cocina Mexicana
by Susanna Palazuelos & Marilyn Tausend & Ignacio Urquiza
ISBN 968-39-0758-X


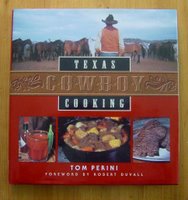
Texas Cowboy Cooking Texas Cowboy Cooking
by Tom Perini
ISBN 0-9713122-0-6


Of course you have your own favourite excellent cookbooks. Please share titles with us, use the comment tab here below!


Keep Smokin' - More to come...


Thanks for reading, leave a comment.

Wednesday, May 31, 2006

Juancho's BBQ Dry Rubs

Join Juancho on his backyard BBQ adventures and discover a safe, sure and easy way to barbecue with optimum results - It's relaxing, it's fun, and it's absolutely delicious!!!
Dry rub, your Granny already used it to season the meat. In its basic form, a dry rub is the combination of salt and pepper that millions of cooks rub in their meat every day.

Of course, certain cuts of meat should be kept natural. No need to change the beautiful taste of a good steak by adding herbs and spices. Just some freshly ground seasalt and black pepper, that's it. (OK, we make an exception for Korean Ribeye…)

However, not all cuts of meat are created equal. Not all meat is tender and juicy like a Black Angus fillet steak. Fortunately, the less tender and less juicy cuts of meat can be very tasty, and they are less expensive, or at least tend to be. And here's where opportunities lure. Opportunities to achieve something extraordinary.

It is very satisfying to take a relatively simple and cheap cut of meat and turn it into a mouthwatering experience. You can do it. On the barbecue. Not by grilling over a hot fire, but by letting it cook slowly near a slow and smoky fire, while you improve taste and tenderness by adding herbs and spices, and some tricks.

One way to improve the taste of meat, or to give it just the extra bit of taste that you like best, is by rubbing a mix of dry herbs and spices onto the meat. This can be done just before you put the meat on the grill.
You can include any combination of herbs and spices in your rub, as long as they come in a dry powder or granulated form. The trick is to find the right combination of flavours while keeping the salt content just right.

Here are a few of our favourite dry rubs:

Juanita's BBQ Rub USA #1

Surprise friend and foe with a true American taste. We have been using this rub once or twice a month for two years now, and it is an absolute winner, especially on chicken or pork. My wife Juanita developed this rub using a recipe from one of Steven Raichlen's wonderful barbecue cookbooks as a starting point.
Save time and make an extra large quantity because you will want to use it again soon!

  • 4 Tablespoons Brown Sugar (firmly packed)
  • 4 Tablespoons Sweet Paprika Powder
  • 4 Tablespoons Seasalt (no iodine)
  • 3 Tablespoons Coarsly Ground Black Pepper
  • 1 Teaspoon Cayenne Pepper
  • 2 Teaspoons Garlic Powder
  • 2 Teaspoons Onion Powder

Put all ingredients in a non-reactive bowl and mix thoroughly. Break any lumps of brown sugar using the back of a spoon.

Use about 1½ to 2 tablespoons of rub for every 2 pounds (±1 kilo) of meat.

The above will yield about 1 cup of dry rub. Put the remaining rub, if any, in an airtight jar or zip-lock bag. Stored in a cool and dark place it will keep for months.


Juancho's BBQ Easy Rib Rub
This easy rub will do magic on your pork spare ribs. It was inspired by the recipe for "Falls County Easy Pork Ribs" in the Legends of Texas Barbecue Cookbook by Robb Walsh. I adjusted the original recipe by bringing down the salt content, and on request of my kids I made it sweeter.

  • 8 Tablespoons Brown Sugar (firmly packed)
  • 3 Tablespoons Seasalt (no iodine)
  • 4 Tablespoons Garlic Powder
  • 4 Tablespoons Coarsly Ground Black Pepper

Put all ingredients in a non-reactive bowl and mix thoroughly. Break any lumps of brown sugar using the back of a spoon.

Use about 1½ to 2 tablespoons of rub for every 2 pounds (±1 kilo) of meat.

The above will yield about 1½ cup of dry rub. Put the remaining rub, if any, in an airtight jar or zip-lock bag. Stored in a cool and dark place it will keep for months.


Juancho's BBQ Mustard Rub
Barbecue is more art than science. And a really relaxing way to get through your week-end. While your kettle grill stands there smoking for a couple of hours you have plenty of time to have a drink and to chew over your sins.

It was during such considerations that I realized that I love pork with mustard. The resulting mix has become one of the family's favourites, we use it on all kinds of meat.
  • 8 Tablespoons Brown Sugar (firmly packed)
  • 3 Tablespoons Seasalt (no iodine)
  • 4 Tablespoons Garlic Powder
  • 4 Tablespoons Coarsly Ground Black Pepper
  • 4 Tablespoons Ground Mustard Seed

Put all ingredients in a non-reactive bowl and mix thoroughly. Break any lumps of brown sugar using the back of a spoon.

Use about 2 to 3 tablespoons of rub for every 2 pounds (±1 kilo) of pork ribs or chicken, more on thicker cuts like a Boston butt or pork shoulder.

The above will yield about 1½ cup of dry rub. Put the remaining rub, if any, in an airtight jar or zip-lock bag. Stored in a cool and dark place it will keep for months.

Keep smokin' - More to come...


Thanks for reading, leave a comment.